
How to Delay Facebook Pixel Event in Google Tag Manager
Looker Studio Masterclass, my advanced & premium course, is now publicly available. 100% for free!
No signups, upsell funnels, order bumps, or nonsense!
Access here >>

Ahmad Kanani
Introduction
The Facebook Pixel helps you track user actions on your website and report them to Facebook Ads for the purpose of conversion tracking and creating custom audiences for retargeting.
Firing a Facebook Pixel event with a short delay, e.g. 5 seconds, allows us to refine our Facebook audiences and therefore, have higher quality audiences for advertising and retargeting purposes. In this tutorial, we are going to use Google Tag Manager and Facebook Pixel to create a Facebook audience of those users that have spent at least five seconds on our website.
This way, we can exclude those who have mistakenly clicked on a link or closed the page immediately and therefore didn’t even have the chance to look at the page or engage with it.
We can later use this data for retargeting purposes to get better results by advertising to a higher quality audience.
1. Create the Base Facebook Pixel Tag
The first step is to create the base Facebook Pixel tag. For this purpose, let’s login to Google Tag Manager and create a new Custom HTML tag.
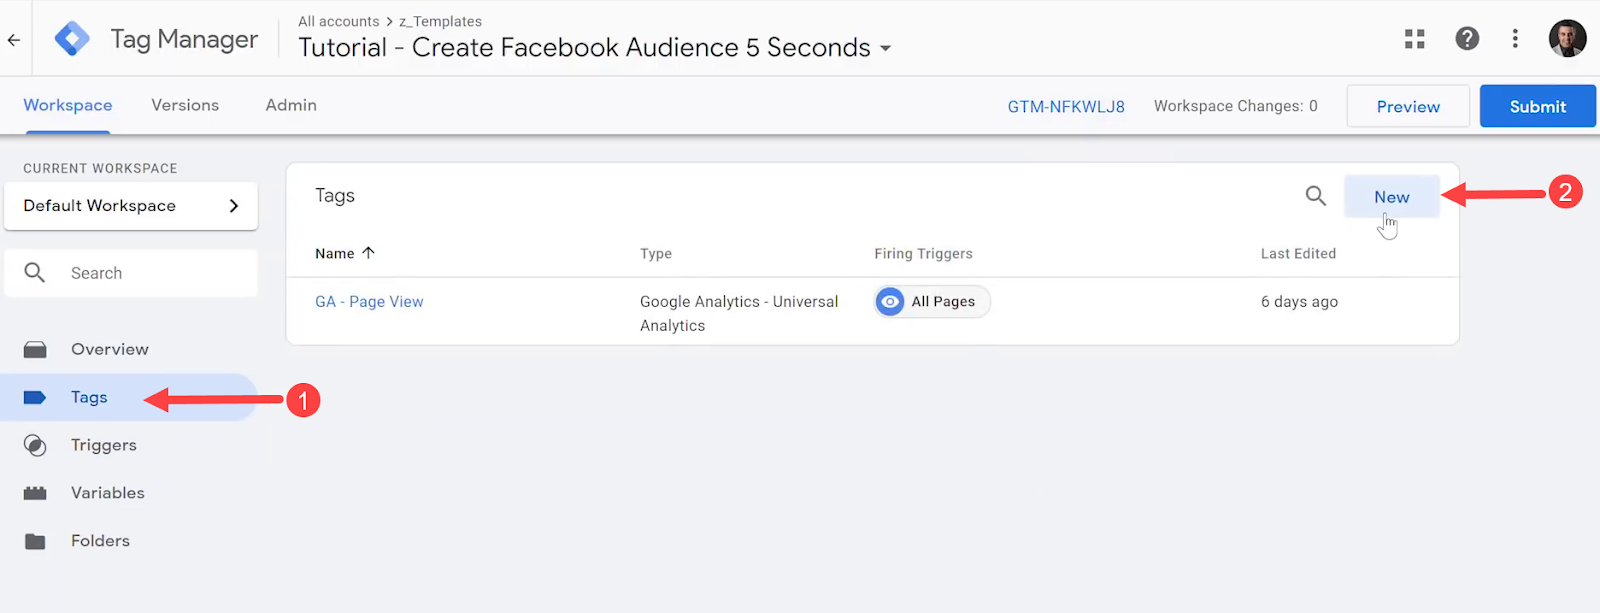
Clicking on the New button shows the following window. Assign a name to this tag and then click on the Tag Configuration box to choose your desired tag.
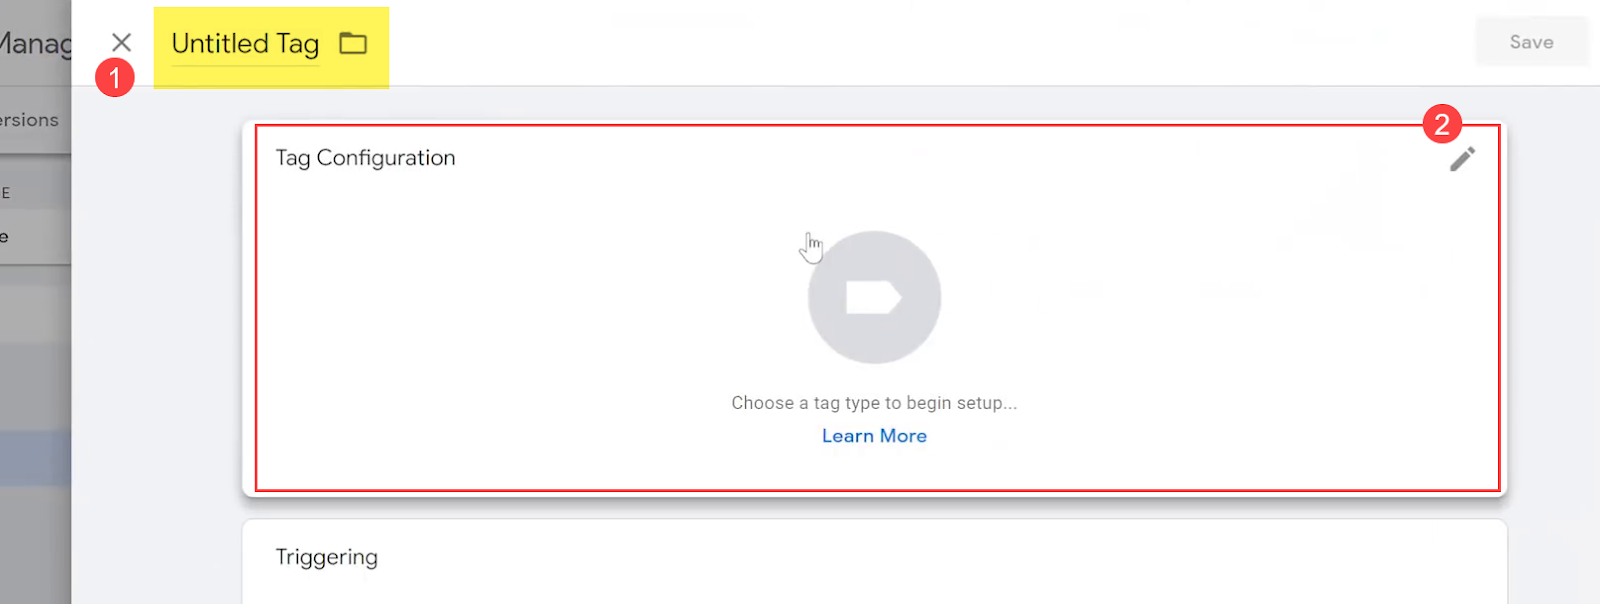
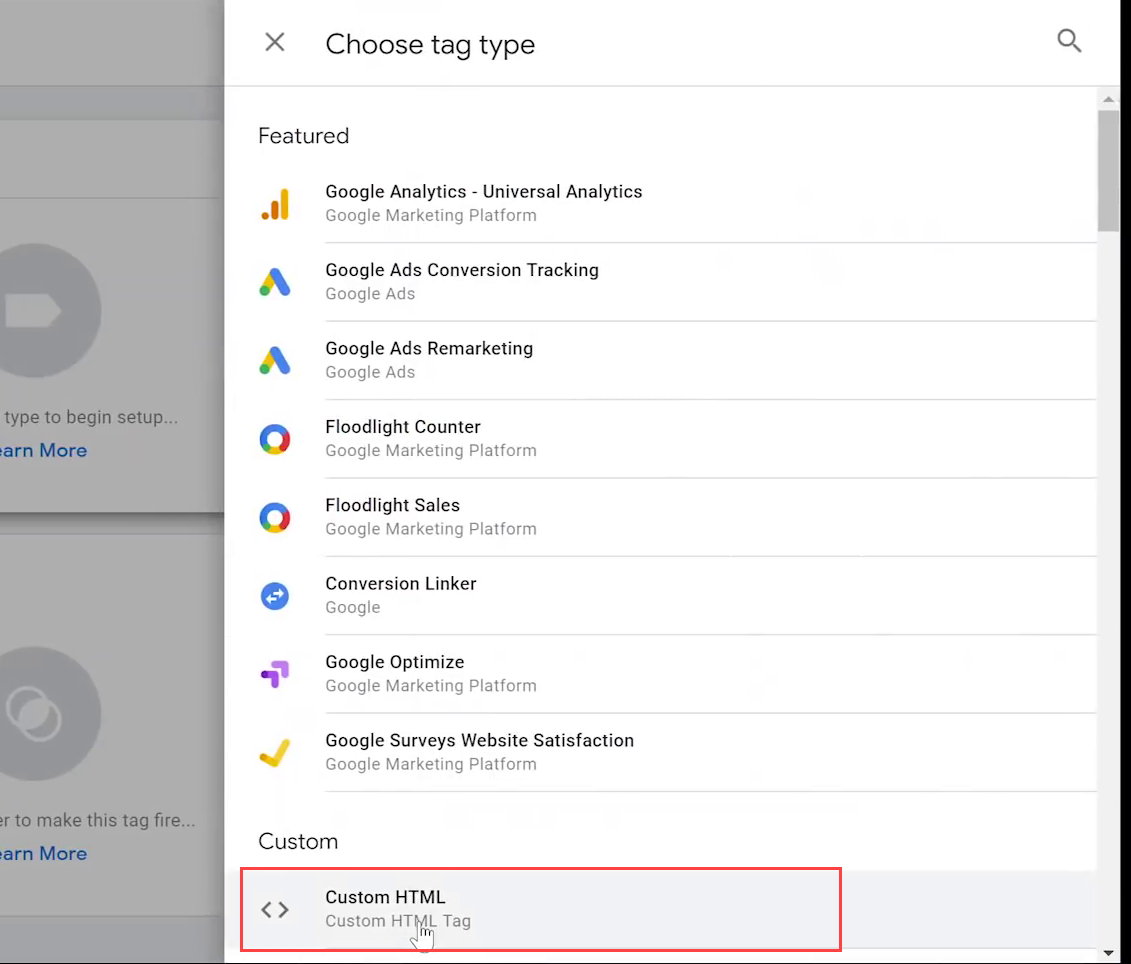
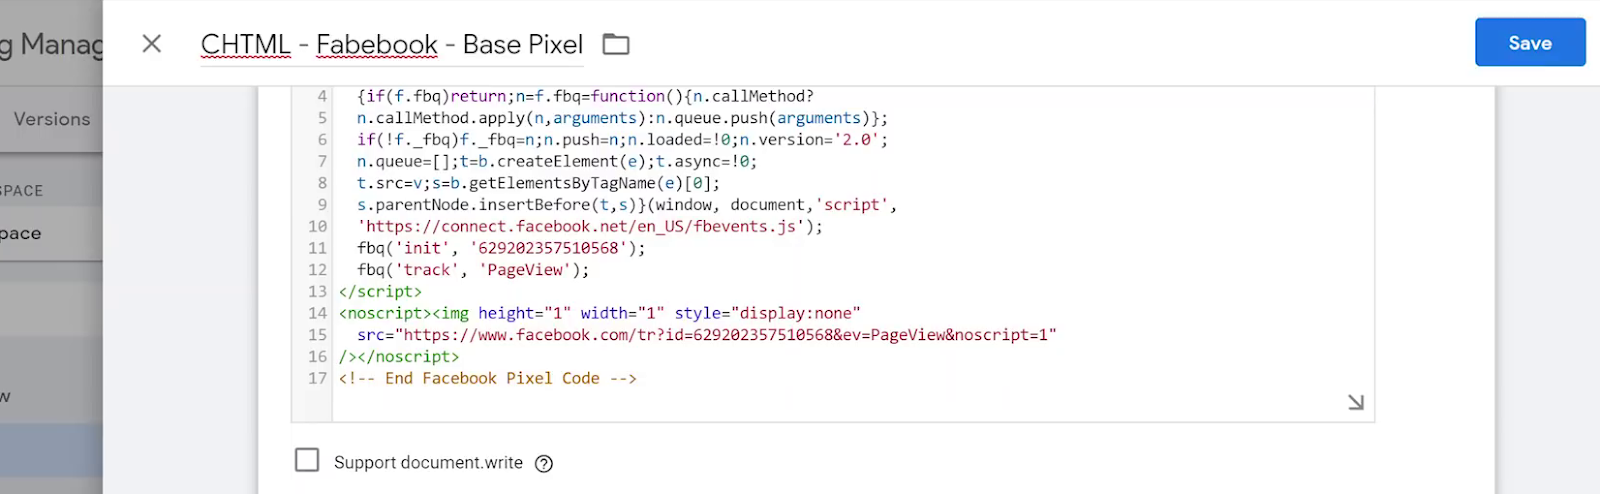
Here we need to choose the Custom HTML tag type and paste the Facebook Pixel tracking script directly into it.
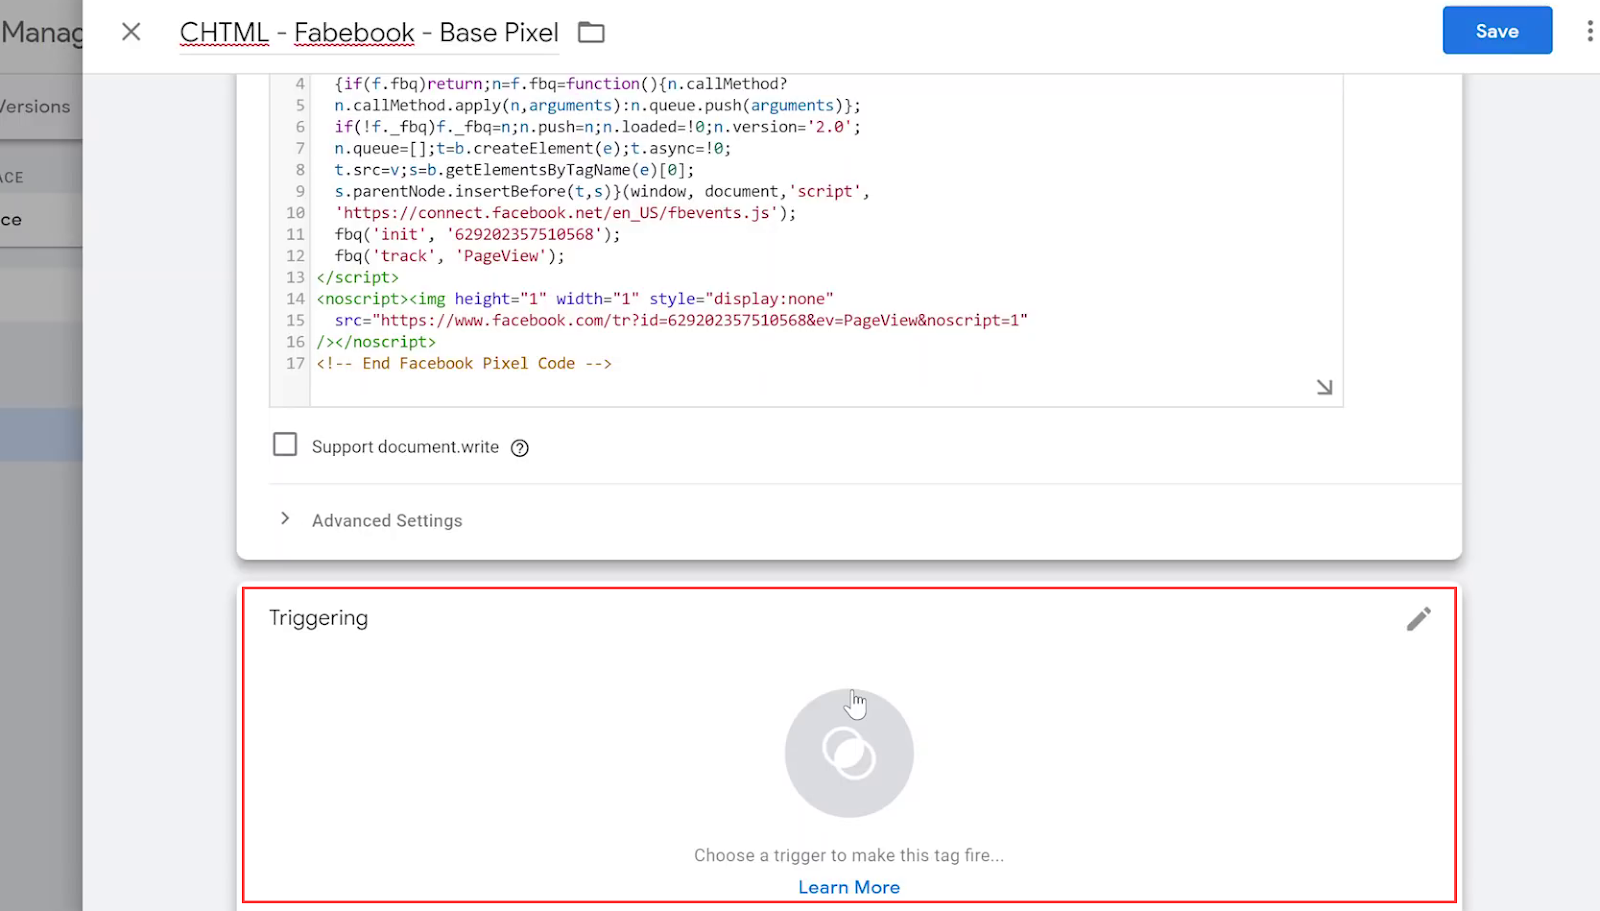
If you scroll down the page, you will see the Triggering box. Choose the trigger type by clicking on it.
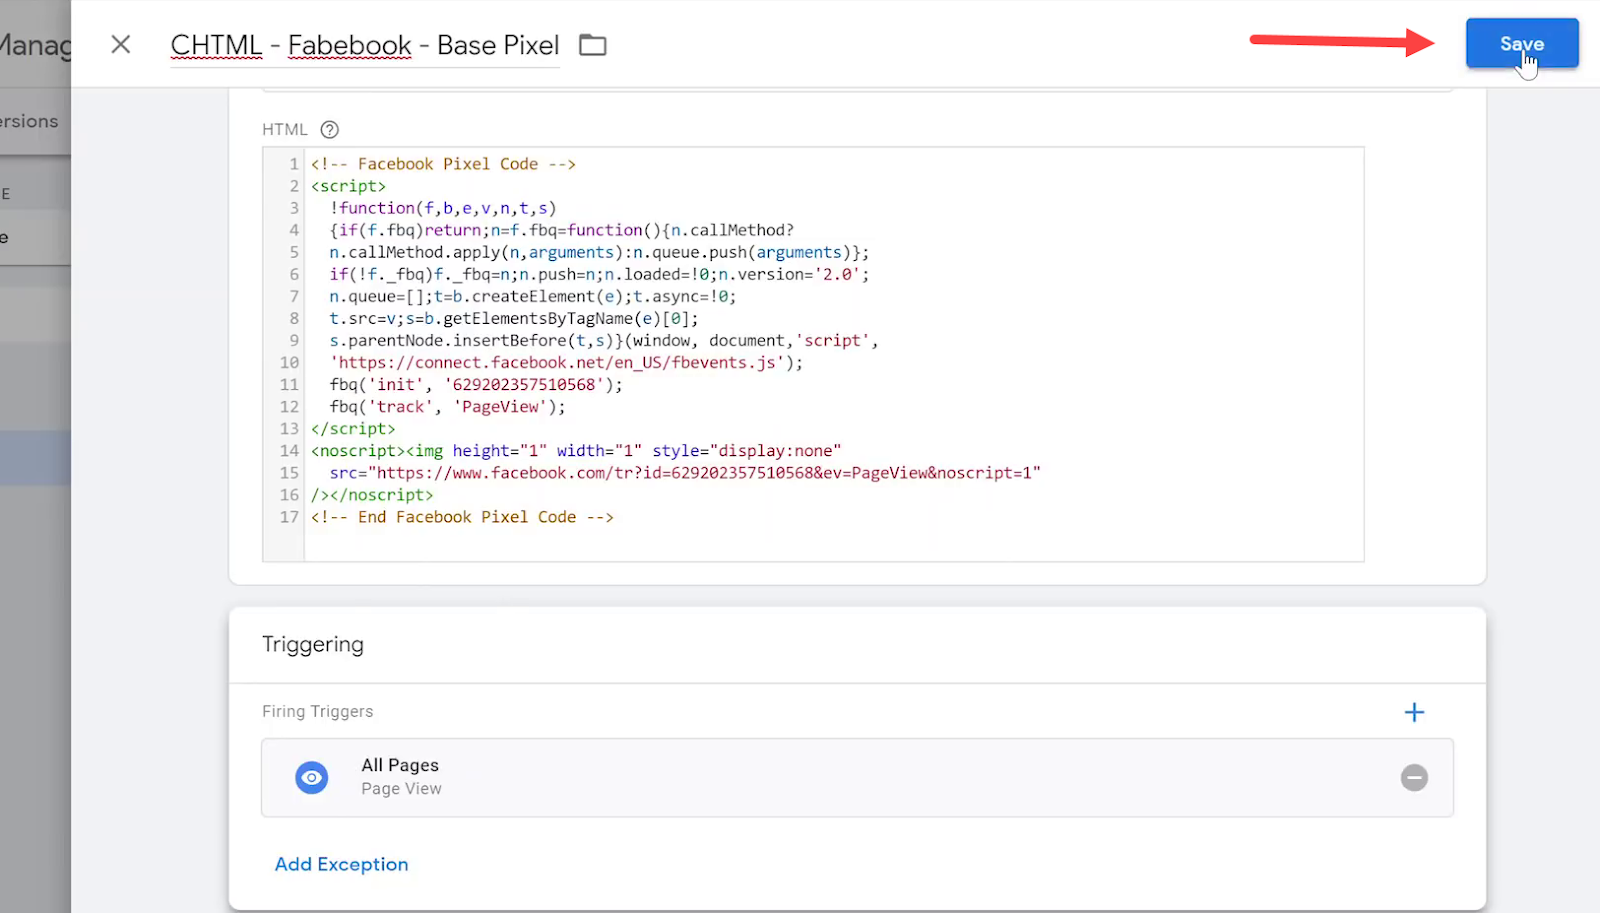
Select All Pages for this tag since we want the Facebook Base Pixel tag to fire immediately on all pages.

After configuring the tag, click on the Save button to close the window.
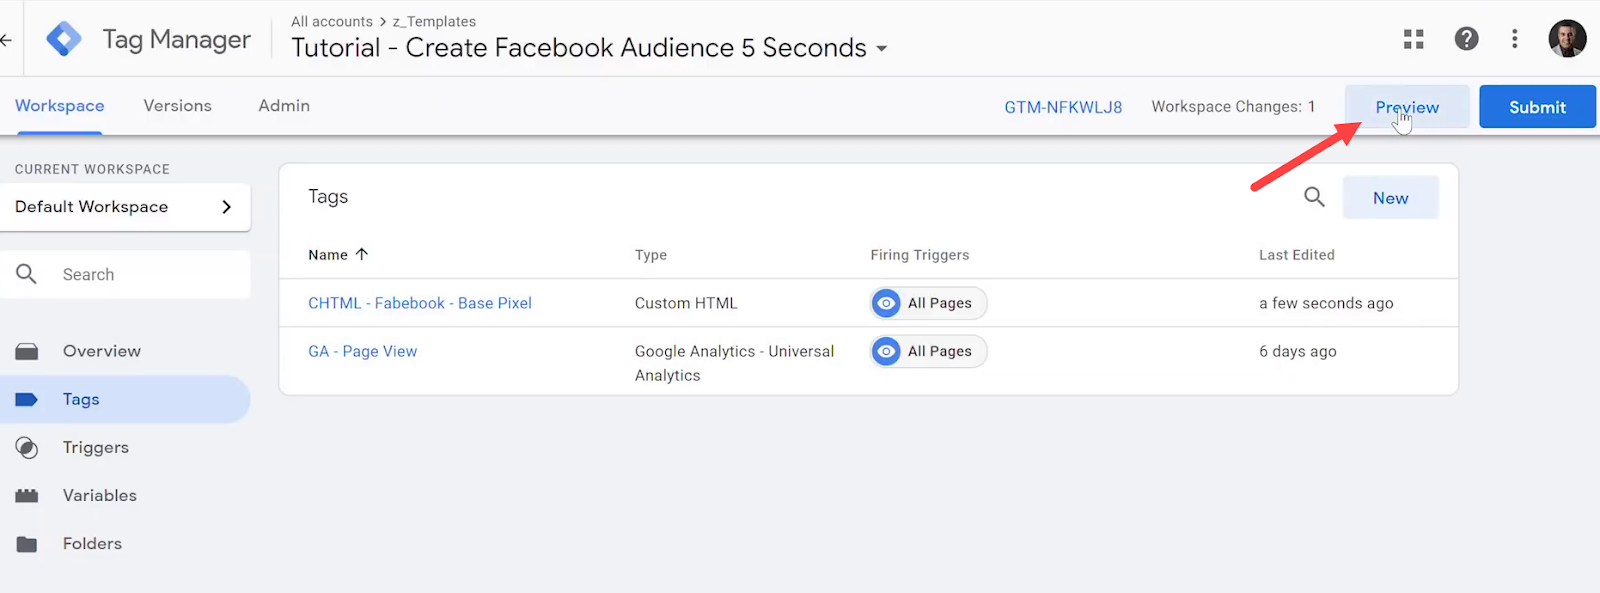
Now, let’s enter the preview mode to see how the tag performs on the website. This can be done by clicking on the Preview button.
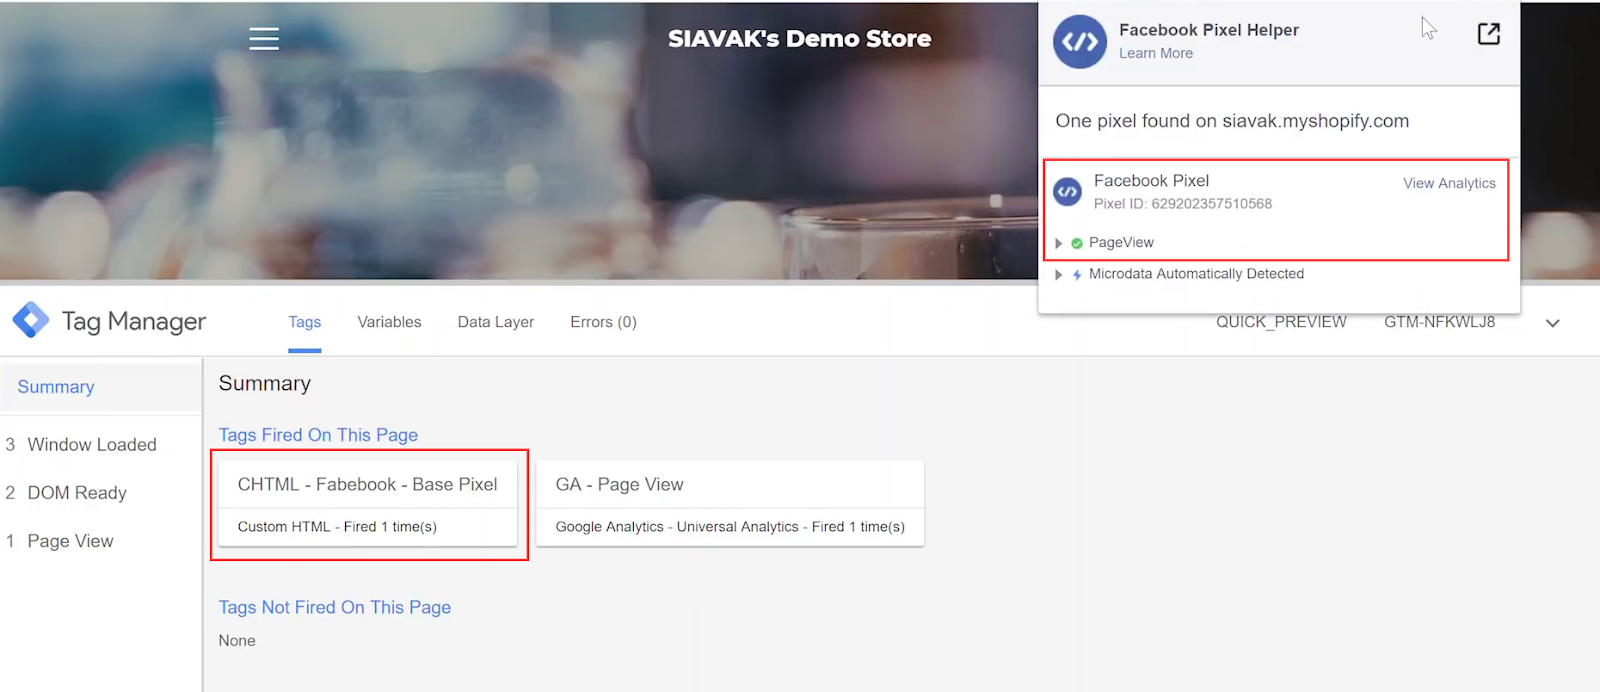
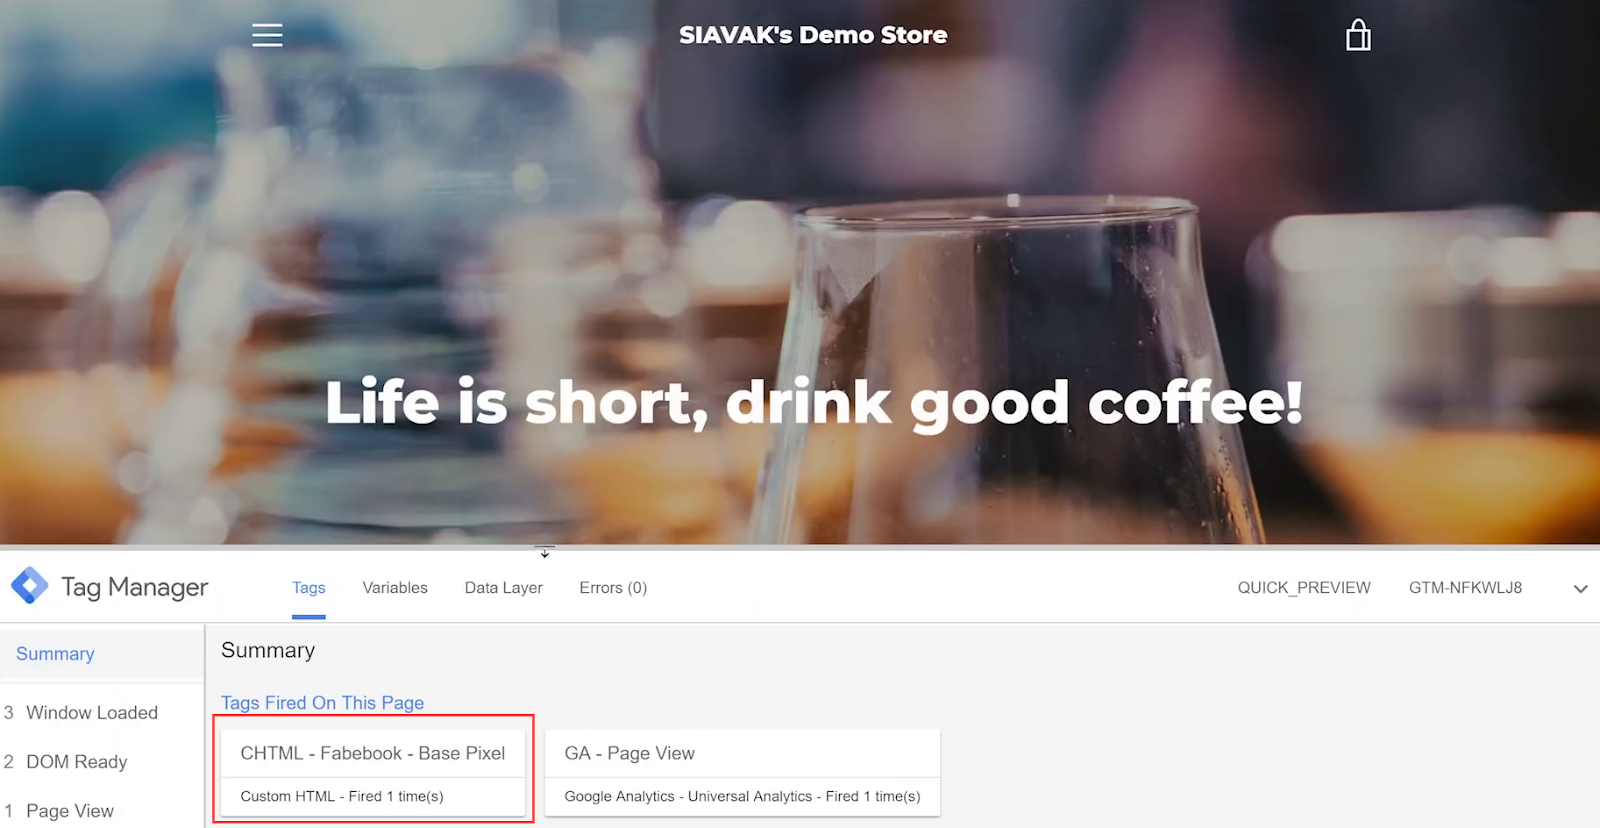
Now that Google Tag Manager is in preview mode, let’s visit the website and refresh the page. You will see that the Custom HTML Facebook Pixel we have just created will fire once.
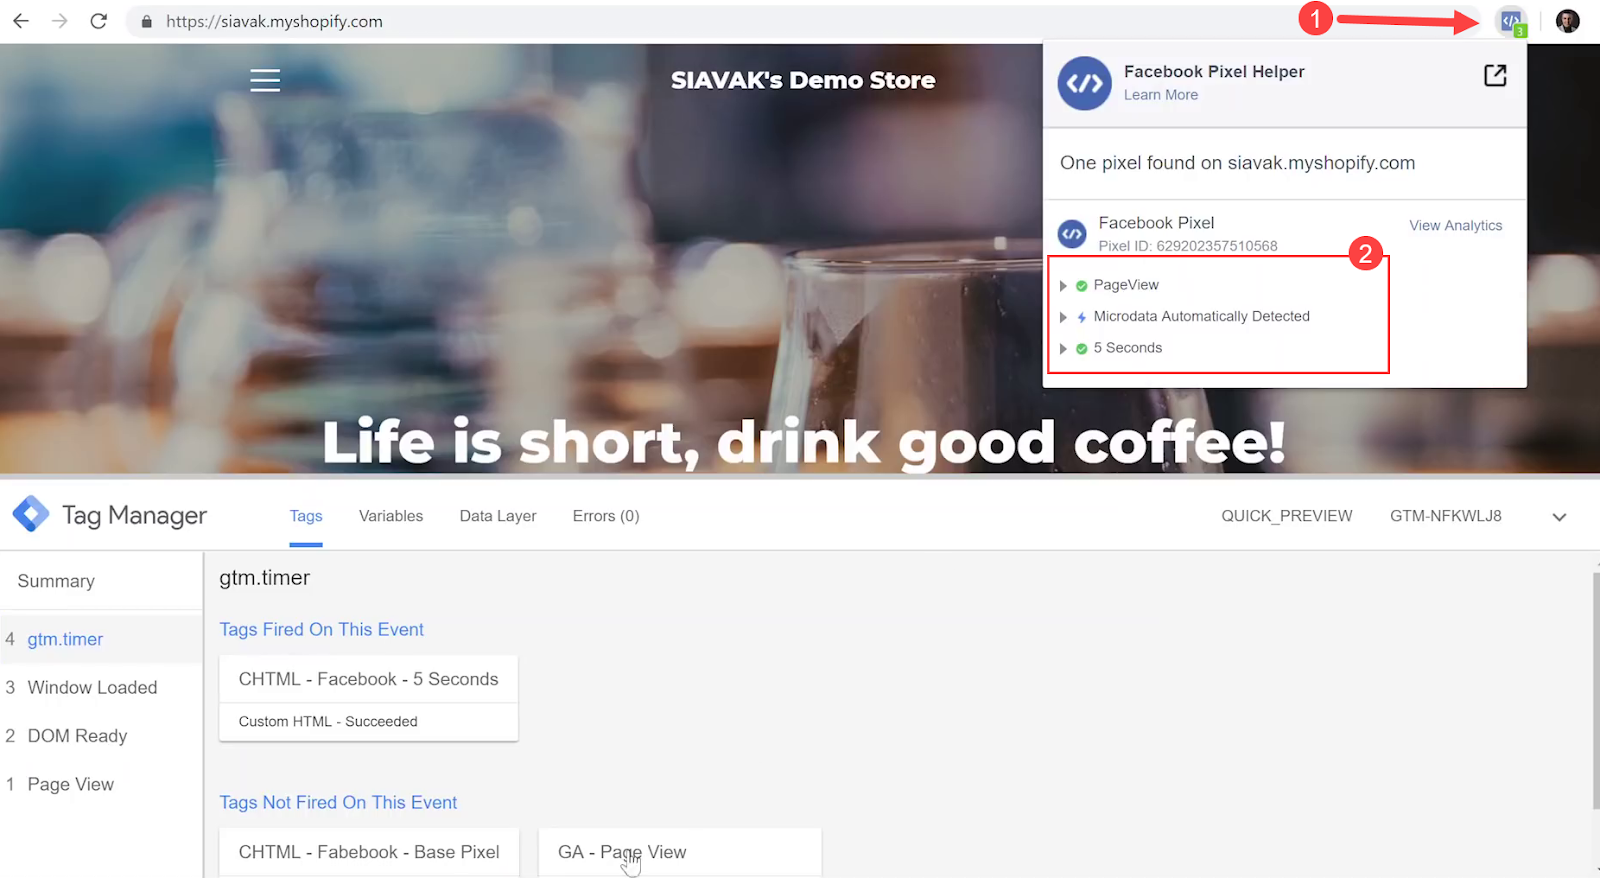
We can also verify in the Facebook Pixel Helper Chrome extension that the page view event of the pixel has been detected.
2. Create a Custom Event Tag
Now that we have successfully created the Facebook Pixel base tag, we can make specific tags for various events based on different user interactions. Next, I will show you how to fire a Facebook Pixel event five seconds after the page loads.
For this purpose, you first need to create a trigger with the above-mentioned conditions.
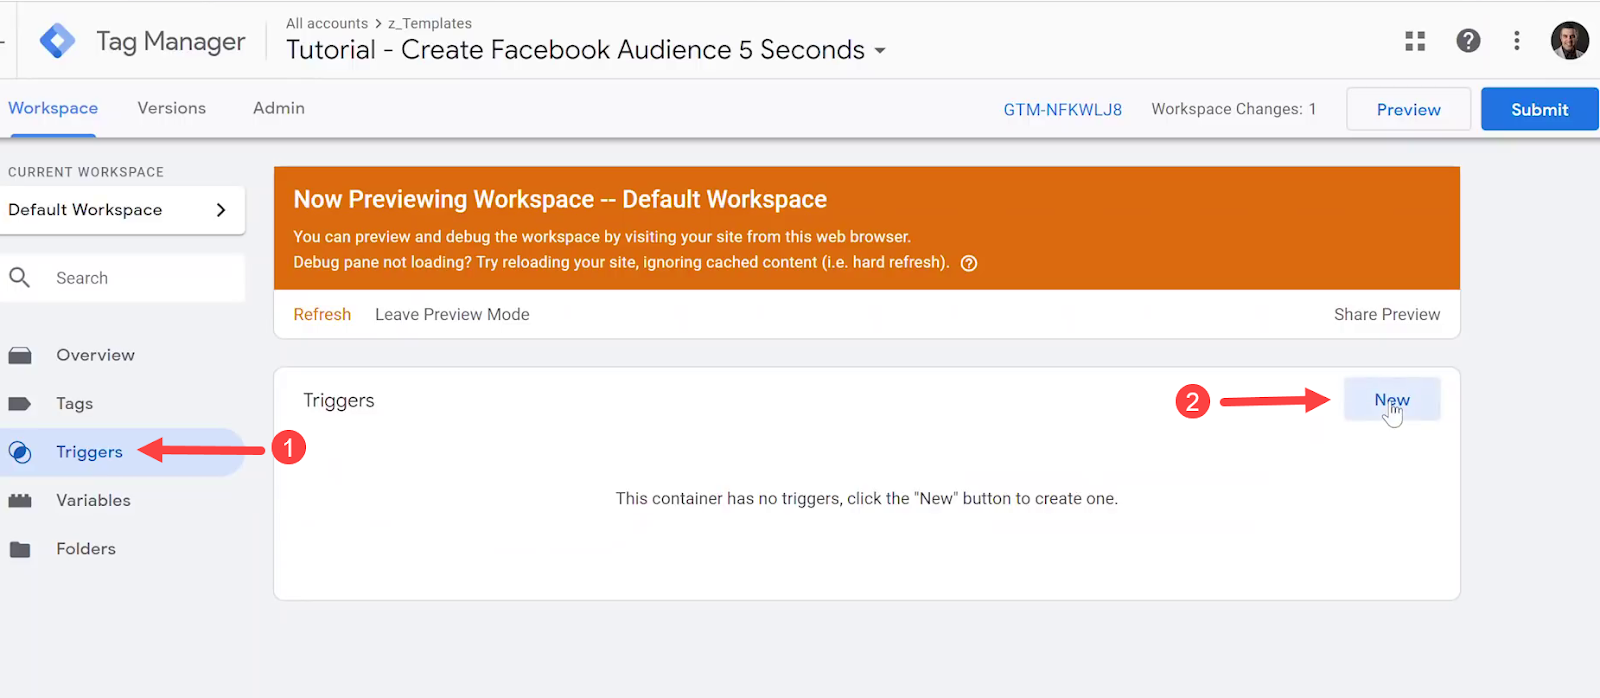
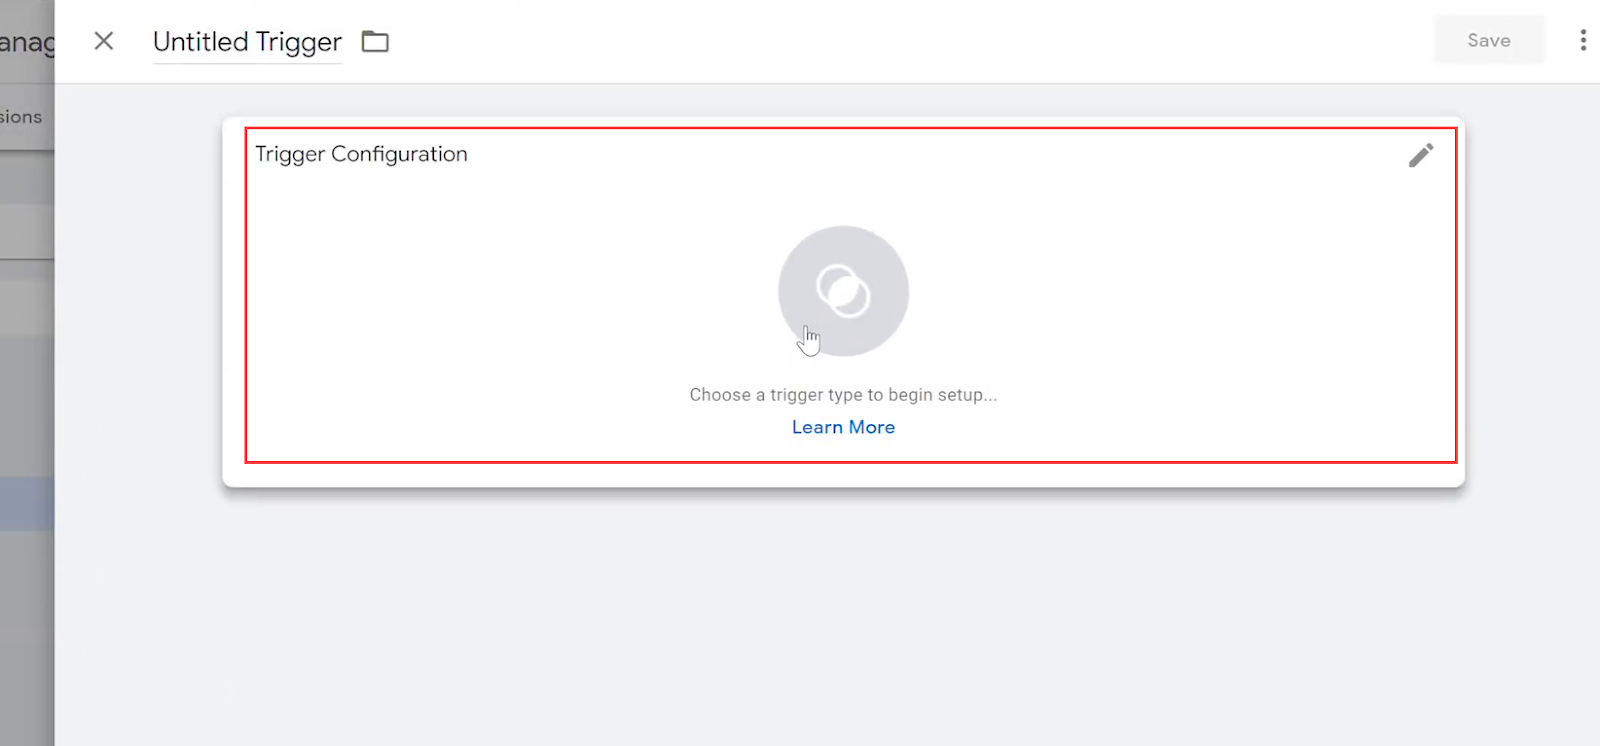
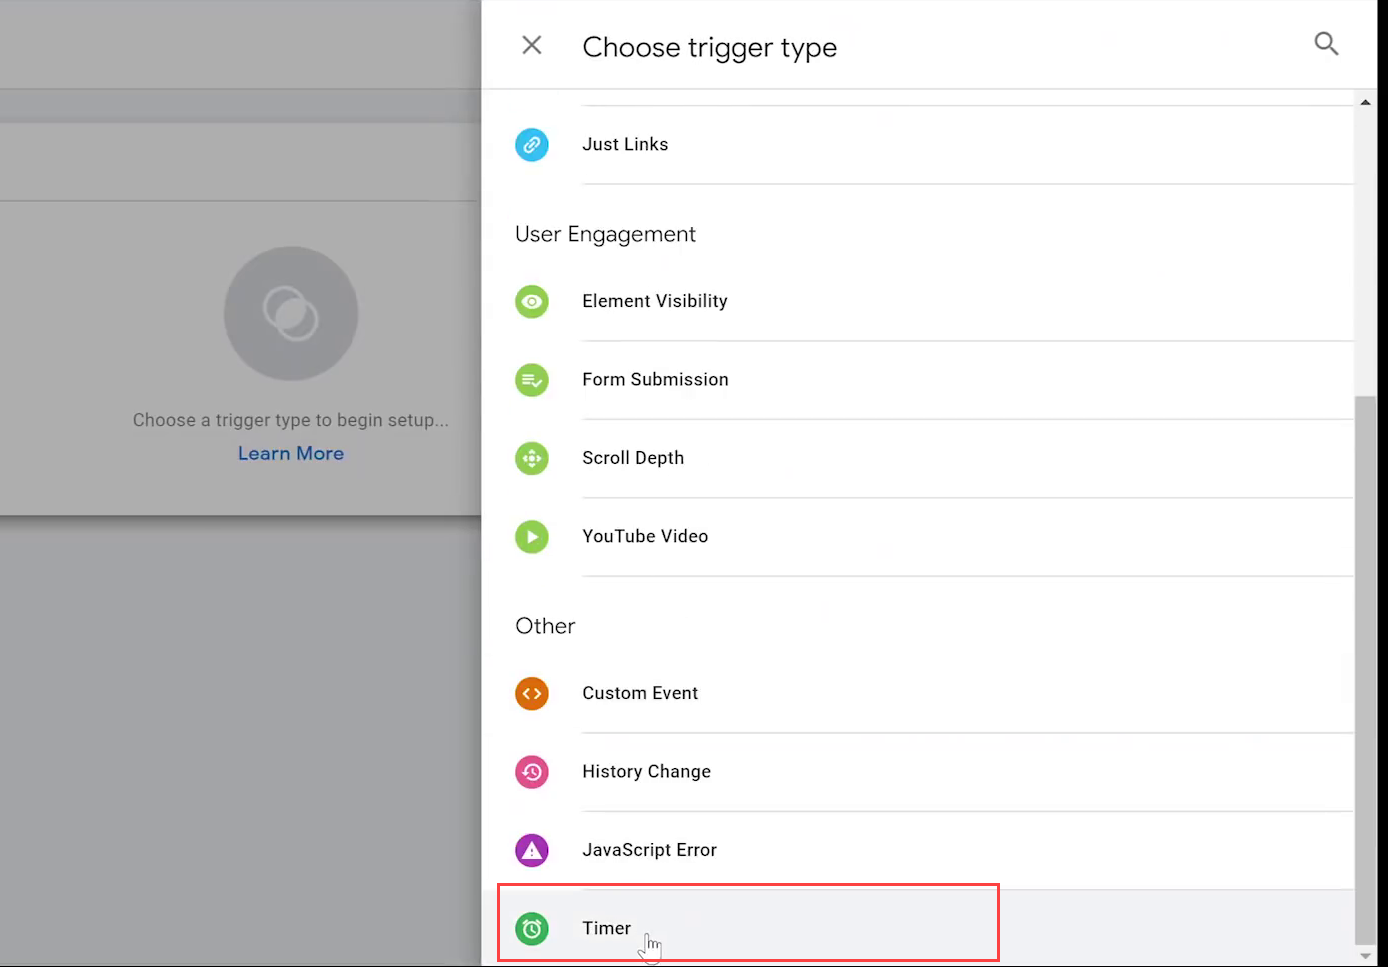
When the Trigger Configuration window appears, click on the Trigger Configuration box and then choose the Timer trigger.
Next, you need to define the conditions of the trigger. Lets’ enter 5 seconds for Interval (5000 milliseconds) and set the Limit to 1 since we want the trigger to fire only once.
Below, you can see the trigger configuration. Click on the Save button to apply the changes.

The Timer trigger will appear on the list.

Next, you need a tag that fires the Facebook Pixel event. Let’s create a new Custom HTML tag.
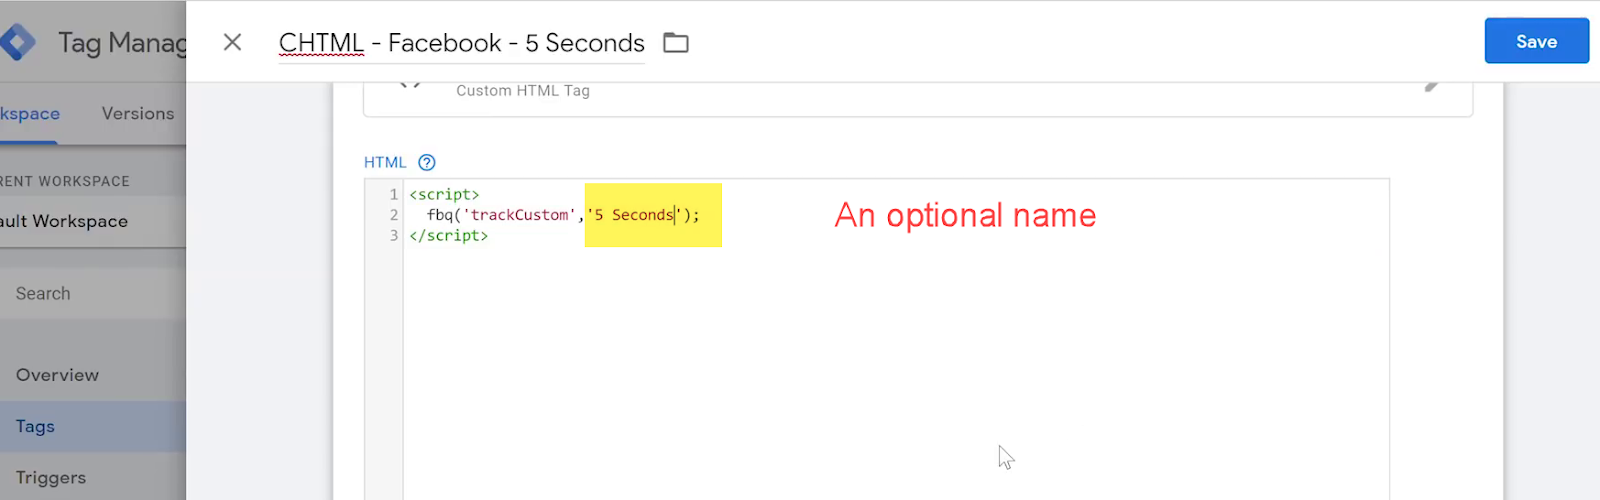
Since spending time on a page is not one of the standard Facebook Pixel events, we need to define a custom one and write some JavaScript.
This is the code we need to use to fire our 5-second Facebook Pixel event.
<script>
fbq(‘trackCustom’,’5 seconds’);
</script>
Now, we need to configure this tag to fire with the Timer trigger that we built in the previous step. Let’s choose the trigger by clicking on the Triggering section and choose Timer - 5 Seconds trigger so that our tag fires five seconds after each page loads.

After saving the tag, similar to the previous step, we need to activate the preview mode.
Now let’s get back to the website and refresh the page. As you can see below, first there’s only the Facebook Base Pixel.
But after five seconds, the new tag fires.
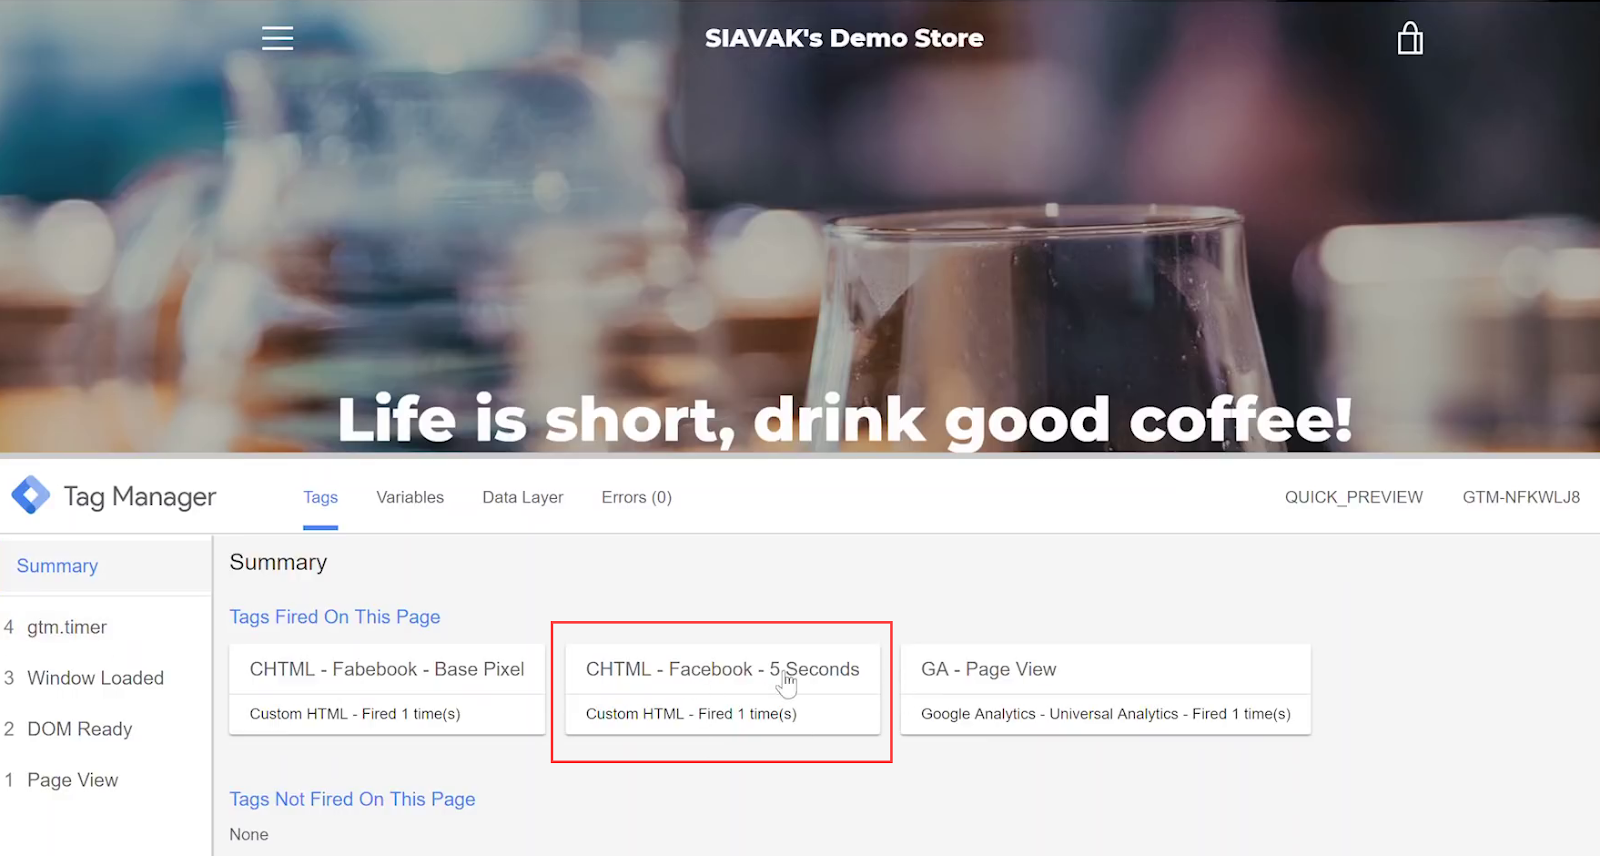
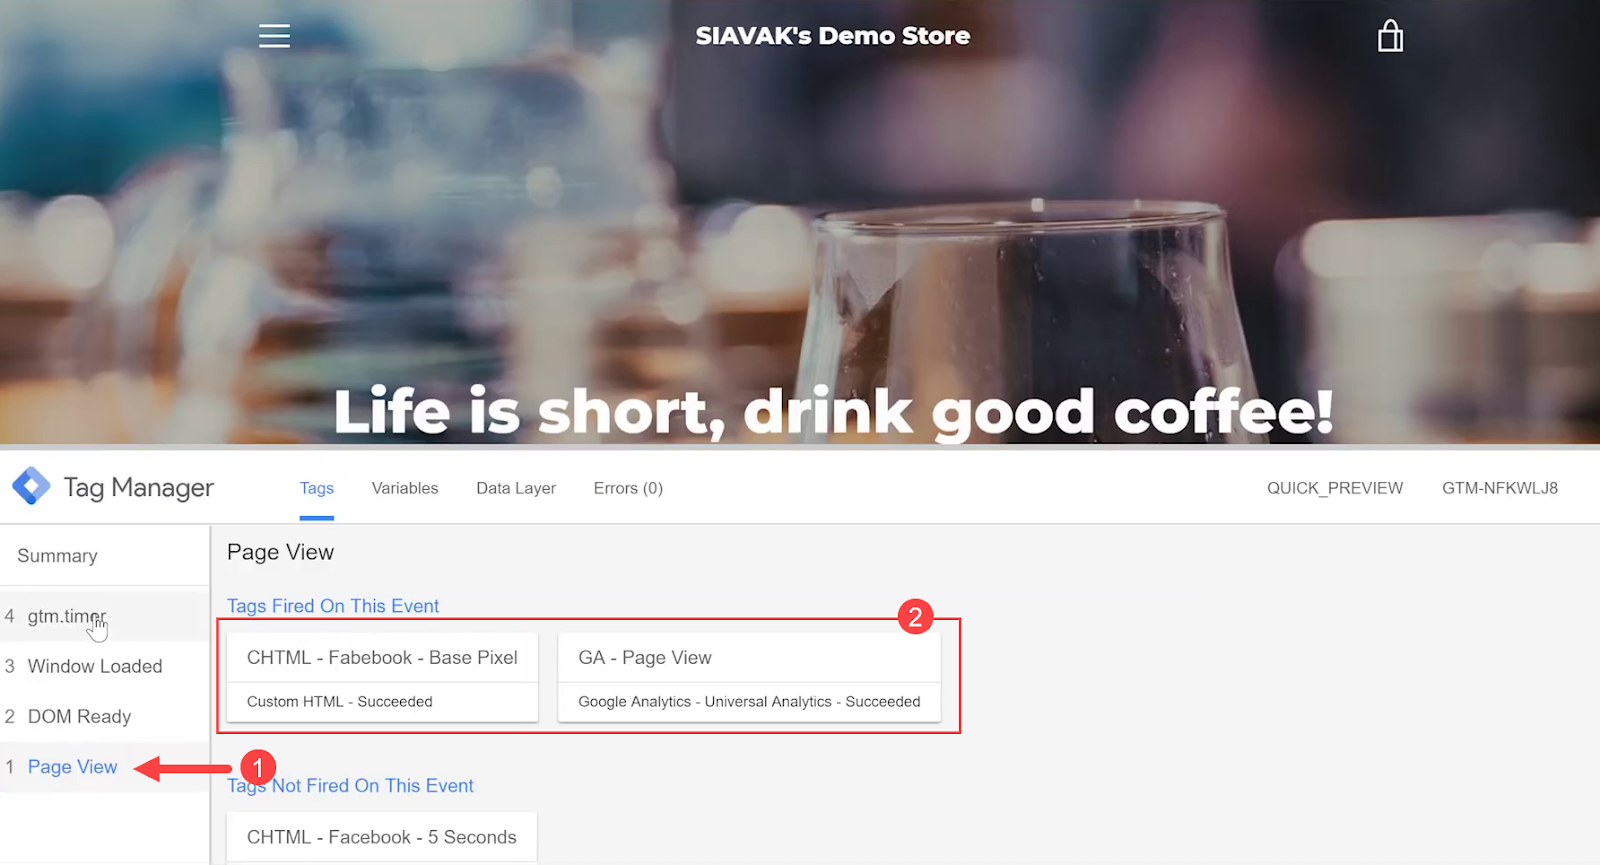
If you check the Page View section you can see the tags that have fired immediately.
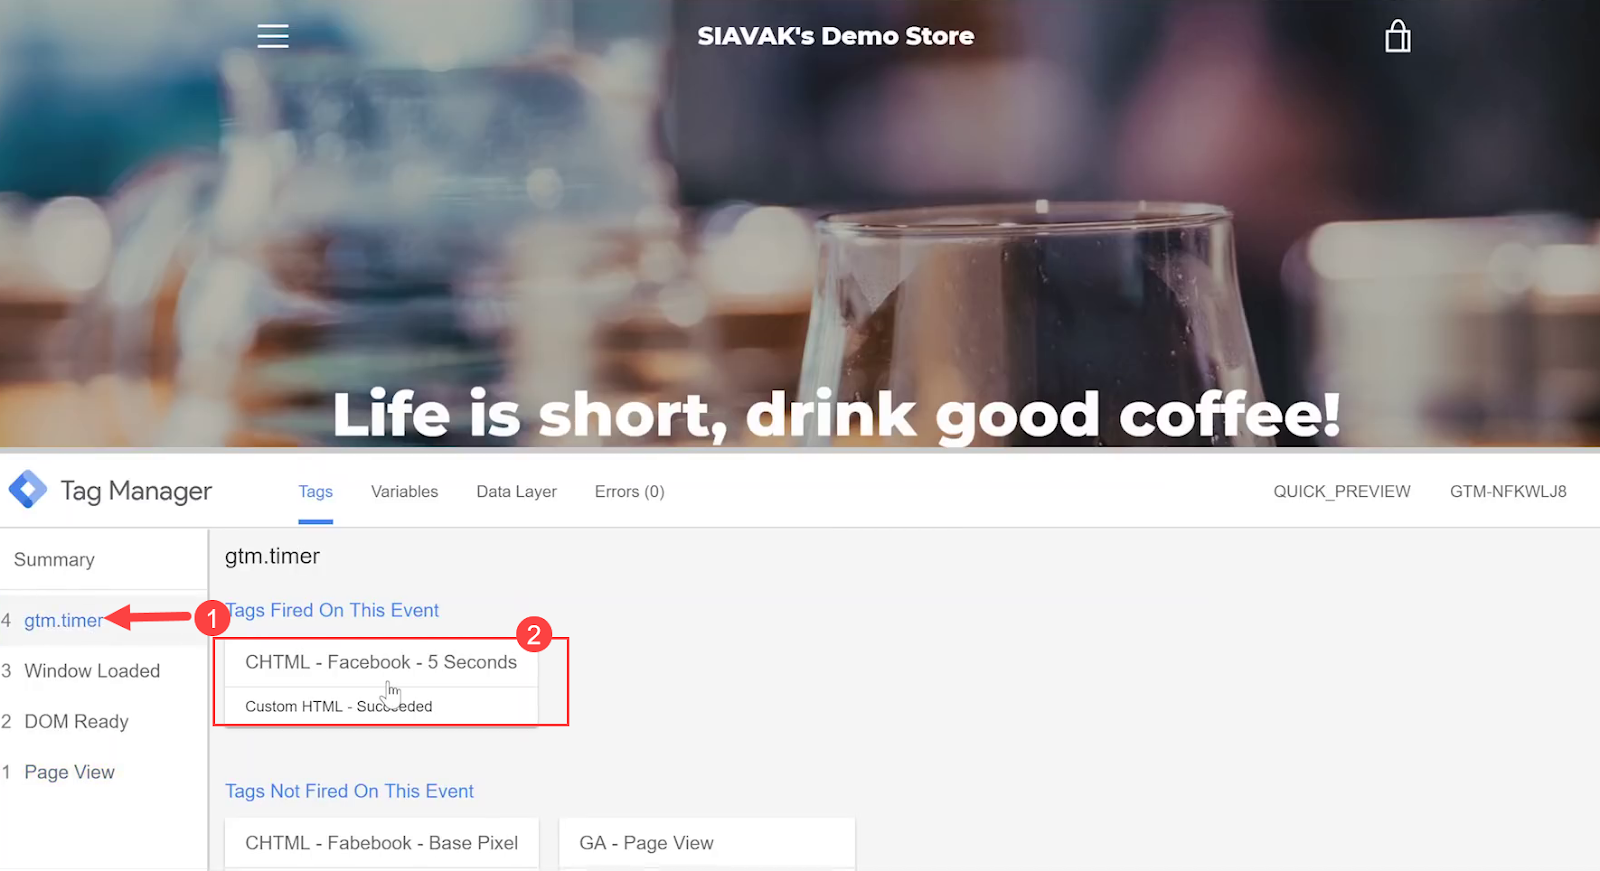
You can also see the gtm.timer that is added to the panel five seconds after the page view.
You can double-check the fired tags by clicking on the Facebook Pixel Helper icon as well.
3. Verify Facebook is Receiving the Events
Now that we verified that the tags are firing, let’s check Facebook Events Manager to also verify that Facebook is actually receiving the events.
After entering the Facebook Events Manager, we can see all the pixel activities by clicking on the Test events panel.

It is a live view so if you refresh your website, you can see all the events in this window simultaneously.
4. Prioritize the Facebook Base Pixel
The Facebook Base Pixel tag initiates the pixel code on the page, and therefore it should be fired before any other Facebook Pixel events.
To ensure that it happens in the first place, we need to configure the advanced settings of this tag.
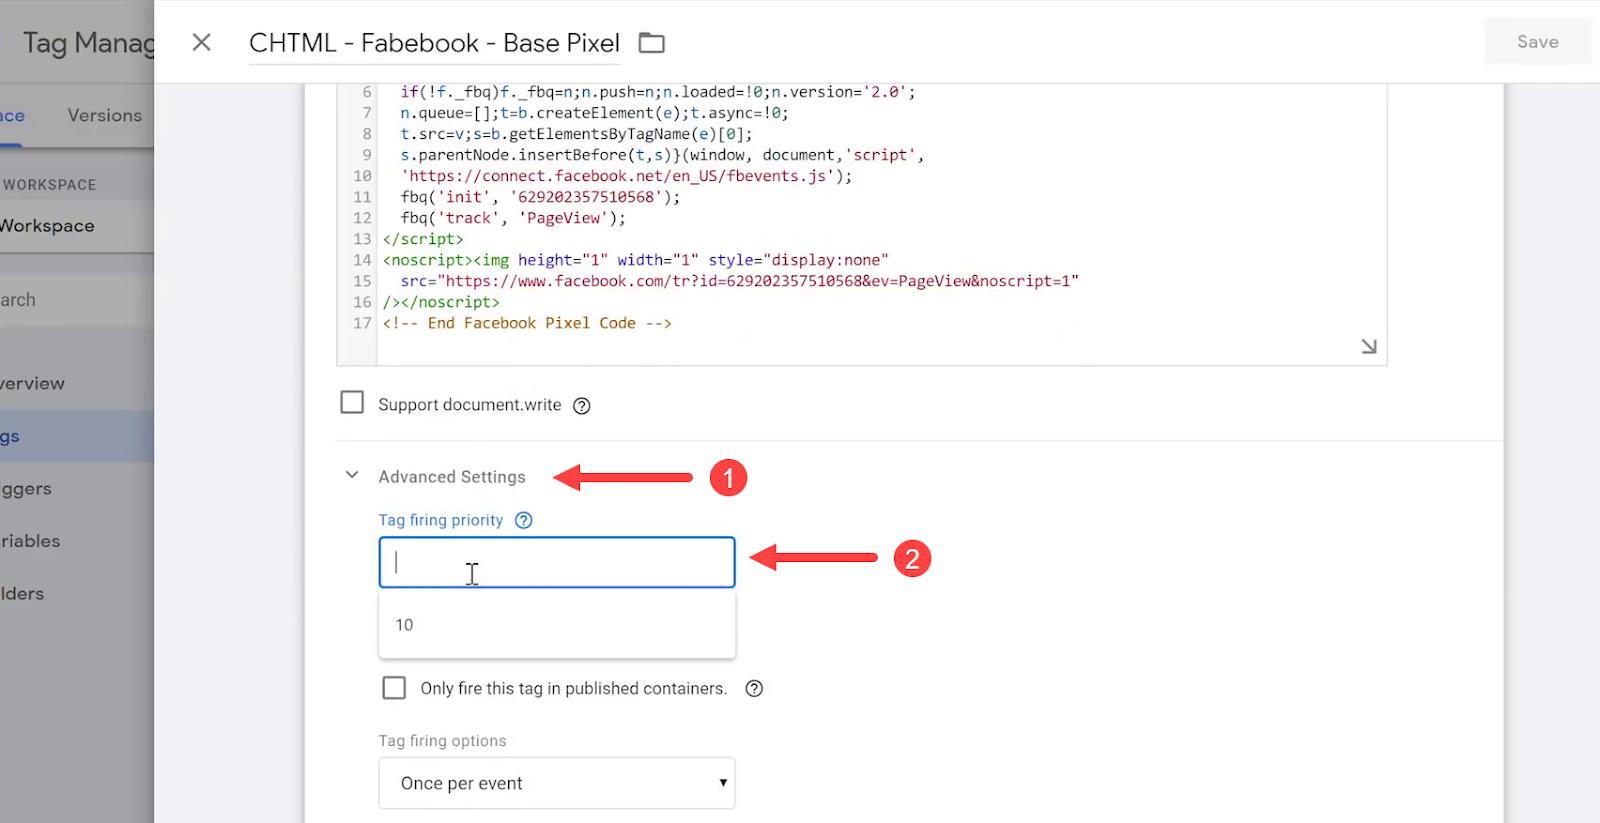
The higher the number of priority, the sooner a tag fires. So we should enter a number more than other Tags in the GTM container. Since all tags have a Tag Firing Priority of 0 by default, we can give our Facebook Base Tag a priority of 10..
5. Create the Audience in Facebook Ads
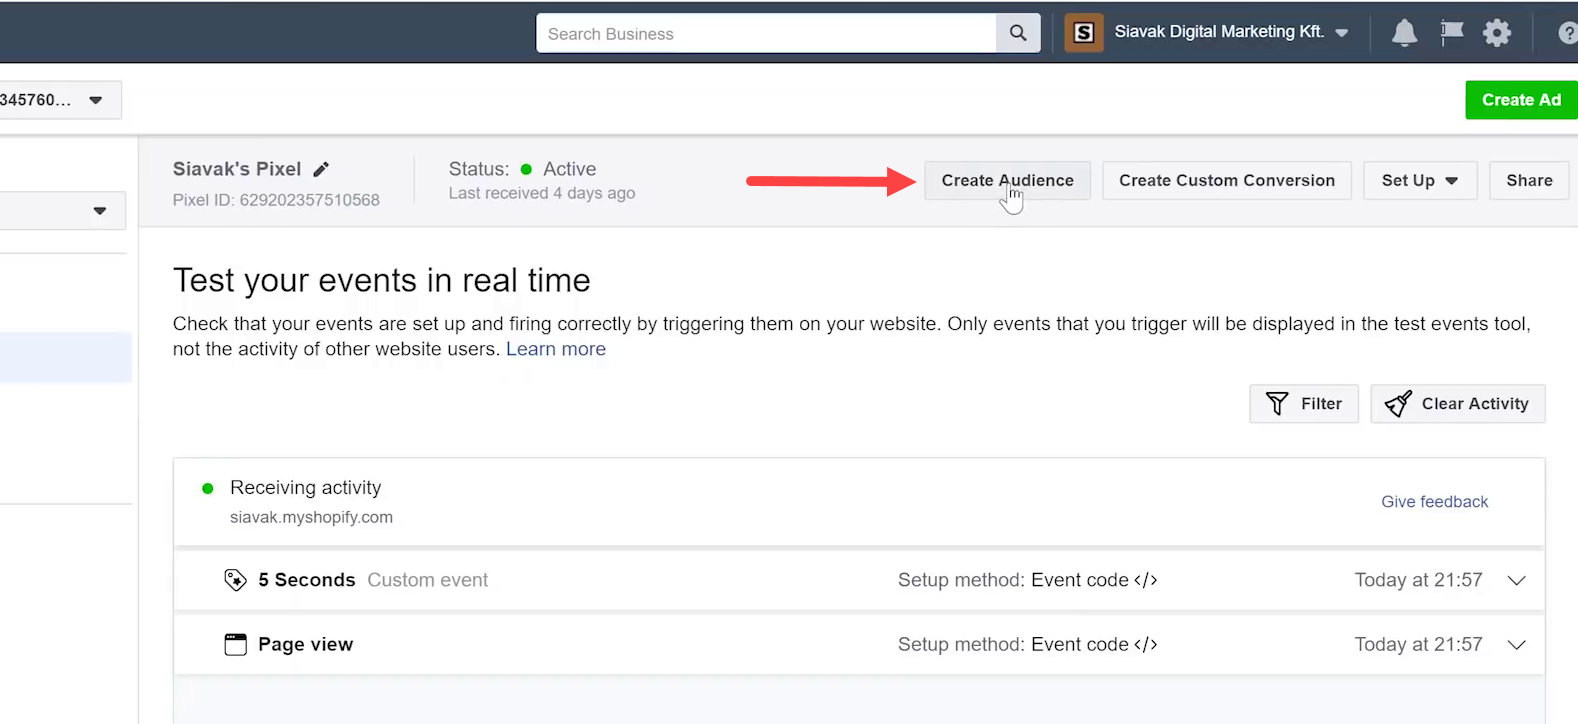
Now that we have all our events prepared and running, it’s time to create the custom audience in the Facebook Events Manager.
Within the Facebook Ads interface, click on the Create Audience button.
And choose your account.

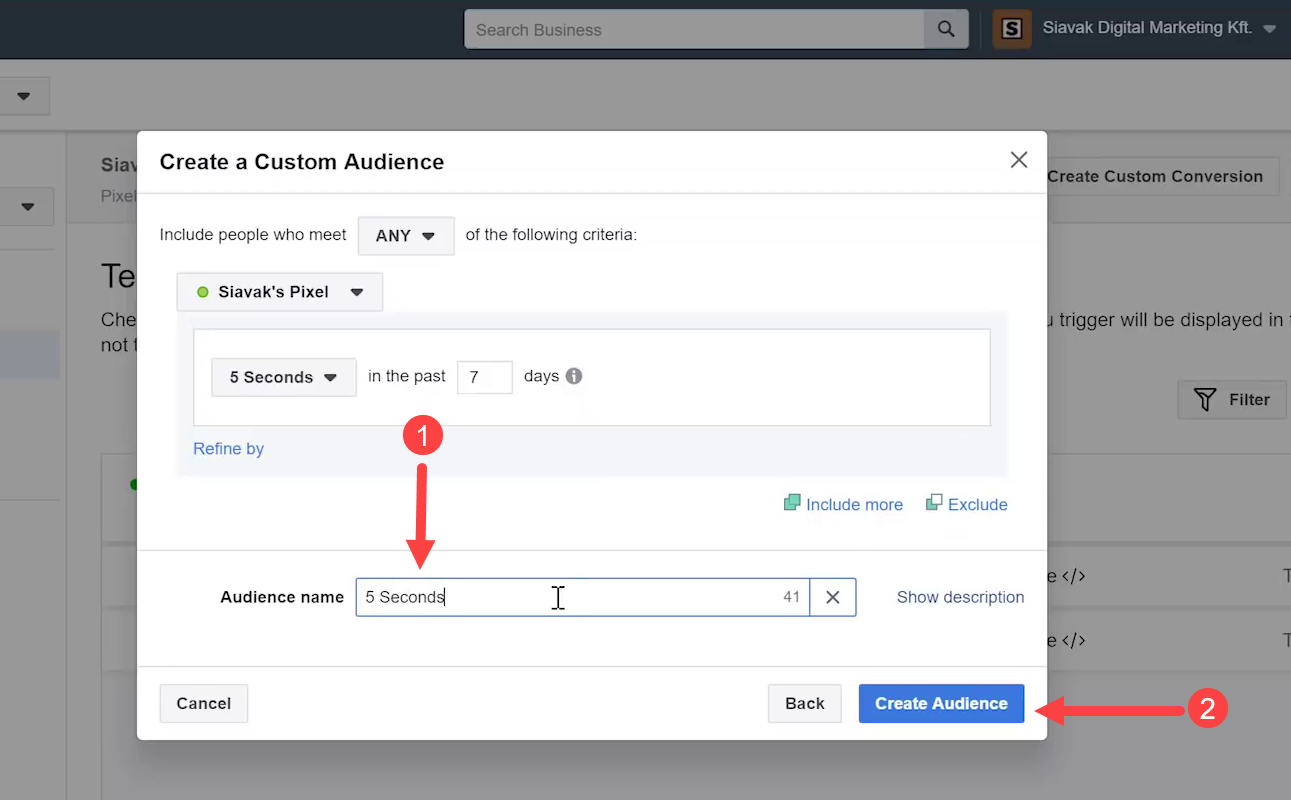
Then choose the preferred item from the menu depending on the type of audience you need and set the duration of the event. In this case, we select From your events and then 5 Seconds, and set the duration to 30 days.
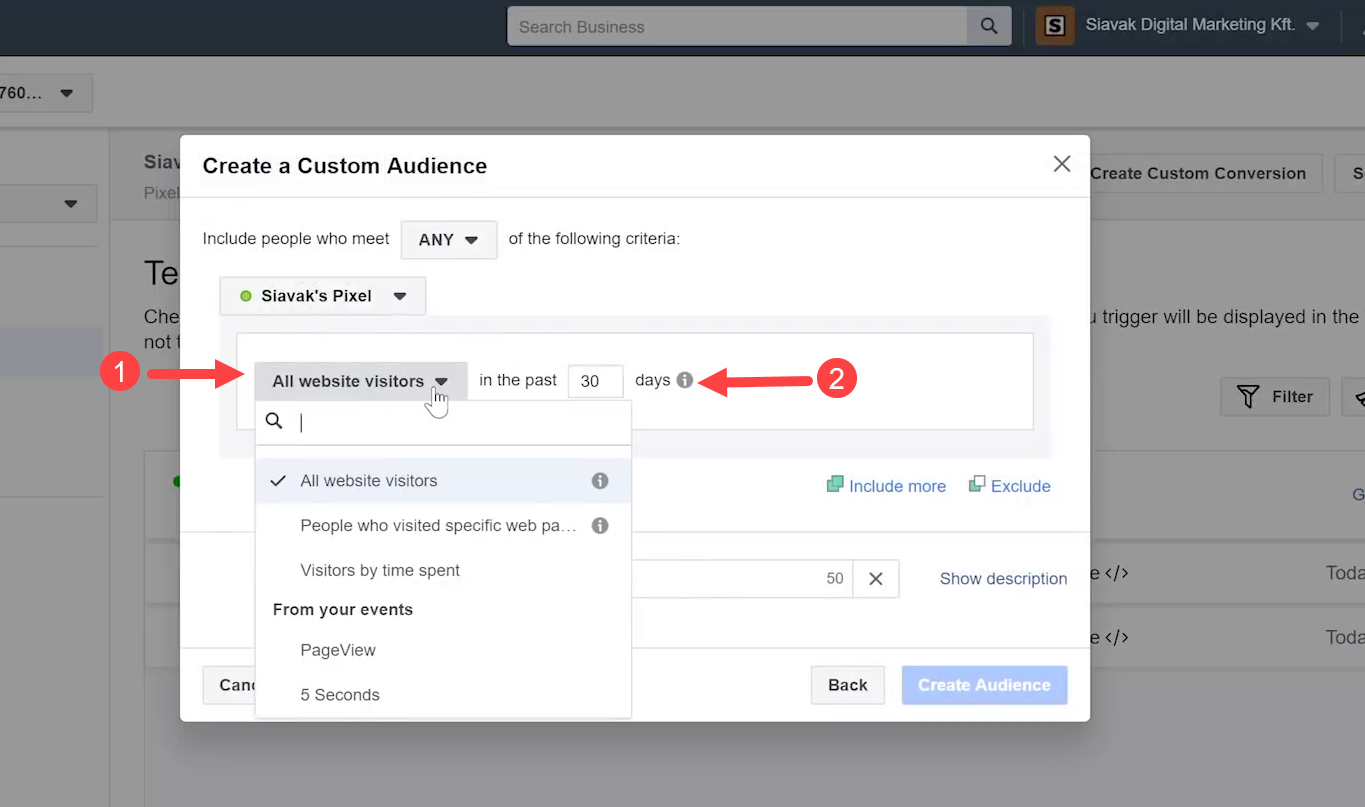
Remember to give the audience a name, and click on the Create Audience button to save the audience.
We are all done. Together we have successfully built a higher quality audience by firing a Facebook Pixel event that was delayed by 5 seconds.
Join Newsletter
Community
Tools
Learn Analytics & CRO


